Layout
Given that Flutter is a UI toolkit, you'll spend a lot of time creating layouts with Flutter widgets. In this section, you'll learn how to build layouts with some of the most common layout widgets, including high-level widgets like Scaffold and AppBar, which lay out the structure of a screen, to lower-level widgets like Column or Row that lay out widgets vertically or horizontally.
Scaffold and AppBar
#Mobile applications often have a bar at the top called an “app bar” that can display a title, navigation controls, and/or actions.

The simplest way to add an appbar to your app is by using two widgets: Scaffold and AppBar.
Scaffold is a convenience widget that provides a Material-style page layout, making it simple to add an app bar, drawer, navigation bar, and more to a page of your app. AppBar is, of course, the app bar.
The code generated from the $ flutter create --empty command already contains an AppBar widget and a Scaffold widget. The following code updates it to use an additional layout widget: Align. This positions the title to the left, which would be centered by default. The Text widget contains the title itself.
Modify the Scaffold within your MainApp's build method:
class MainApp extends StatelessWidget {
const MainApp({super.key});
@override
Widget build(BuildContext context) {
return MaterialApp(
home: Scaffold(
appBar: AppBar(
title: Align(
alignment: Alignment.centerLeft,
child: Text('Birdle'),
),
),
body: Center(child: Tile('A', HitType.hit)),
),
);
}
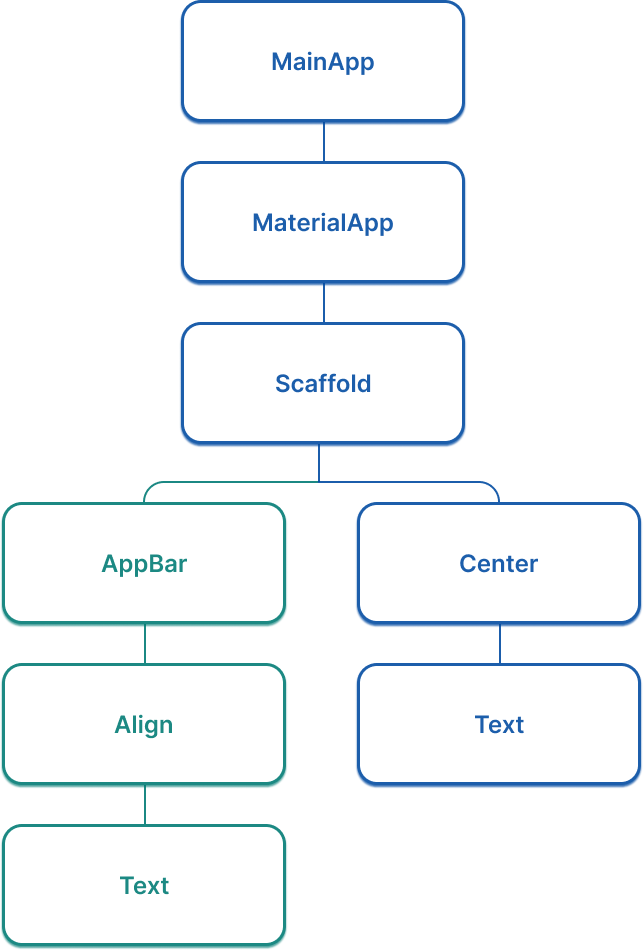
}An updated widget tree
#Note that your app's widget tree gets more important as your app grows. At this point, there's a "branch" in the widget tree for the first time, and it now looks like the following figure.
Create the GamePage widget
#Add the following code for a new widget, called GamePage, to your main.dart file. This widget will eventually display the UI elements needed for the game itself.
class GamePage extends StatelessWidget {
  const GamePage({super.key});
  // This manages game logic, and is out of scope for this lesson
  final Game _game = Game();

  @override
  Widget build(BuildContext context) {
    // TODO: Replace with screen contents
    return Container();
  }
}Arrange widgets with Column and Row
#The GamePage layout contains the grid of tiles that display a user’s guesses.

There are a number of ways you can build this layout, and the simplest is with Column and Row widgets. Each row contains five tiles that represent the five letters in a guess, with five rows total. You’ll need a column with five rows, each row containing five children. First, return a Column (wrapped with a Padding widget) from the GamePage.build method.
class GamePage extends StatelessWidget {
  const GamePage({super.key});
  // This manages game logic, and is out of scope for this lesson
  final Game _game = Game();

    @override
    Widget build(BuildContext context) {
      return Padding(
        padding: const EdgeInsets.all(8.0),
        child: Column(
          spacing: 5.0,
          children: [
            // Add children next
          ],
        ),
      );
    }`
}
The spacing property puts five pixels between each element on the main axis.
Within Column.children, add one row for each element in the _game.guesses list.
class GamePage extends StatelessWidget {
  const GamePage({super.key});
  // This manages game logic, and is out of scope for this lesson
  final Game _game = Game();

  @override
  Widget build(BuildContext context) {
    return Padding(
      padding: const EdgeInsets.all(8.0),
      child: Column(
        spacing: 5.0,
        children: [
          for (var guess in _game.guesses)
              Row(
                spacing: 5.0,
                children: [
                // tiles
                ]
              ),
          ],
      ),
    );
  }
}
This is called a collection-for loop, a Dart feature that allows you to unfurl a list inside of another list when the loop is executed. This syntactic sugar makes it easier for you to work with collections of widgets and achieves the same as the following psuedo code:
[...ListOfData.map((element) => Widget(element)).toList()],In this case, it adds five Row widgets to the column, one for each guess on the Game object.
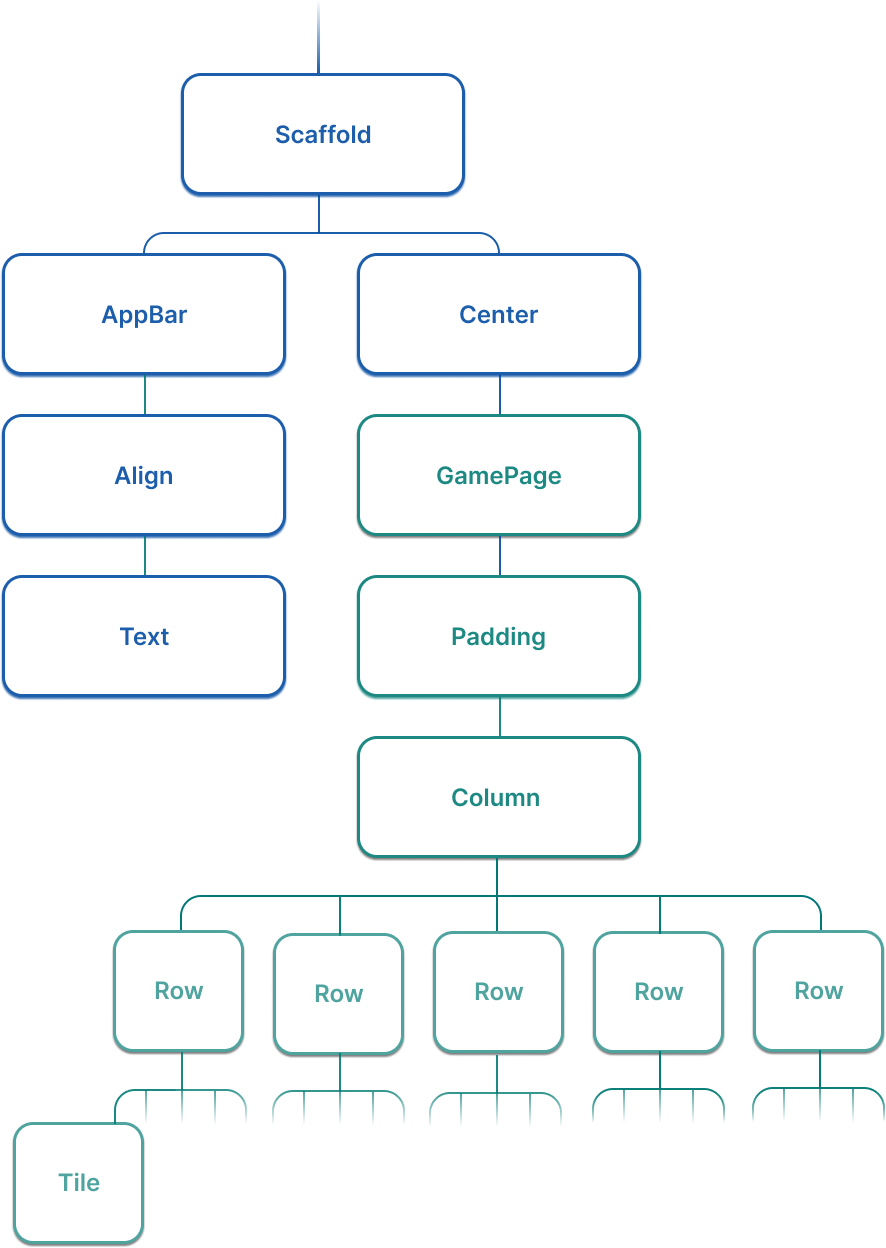
An updated widget tree
#The widget tree for this app has expanded significantly in this lesson. Now, it looks more like the following figure (although it's abridged for legibility.)
An updated widget tree
#Considering your app's widget tree gets more important as your app grows. At this point, there's a "branch" in the tree for the first time, and it now looks like the following figure.
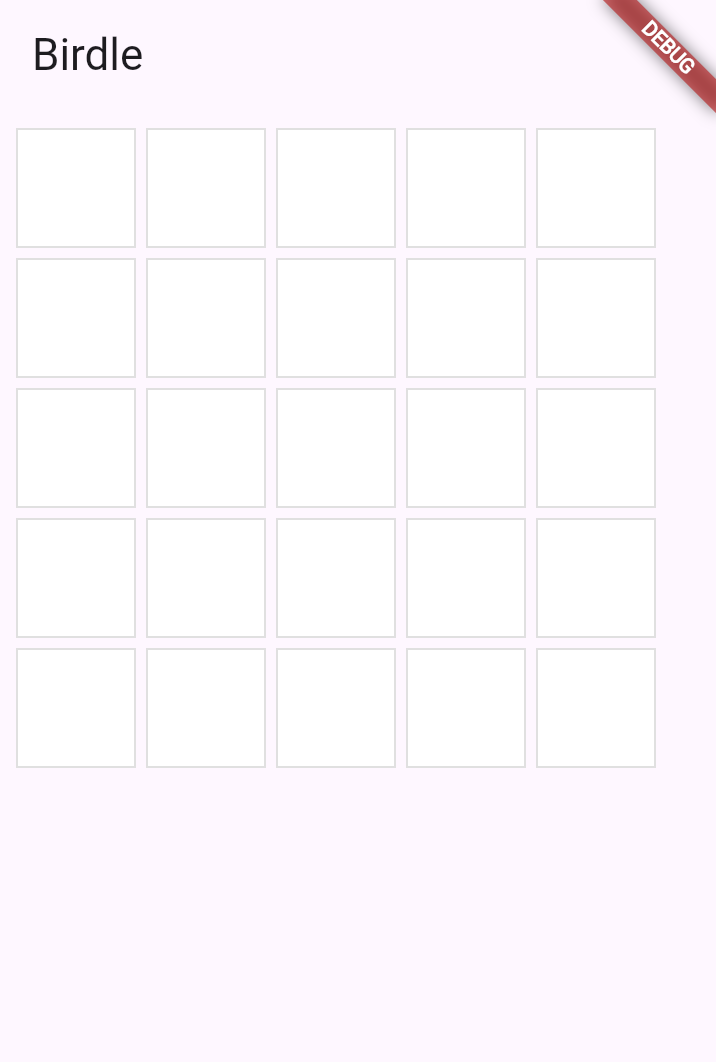
When you reload your app, you should see a 5x5 grid of white squares.
Unless stated otherwise, the documentation on this site reflects the latest stable version of Flutter. Page last updated on 2025-06-06. View source or report an issue.