Feature integration
How to integrate with other Flutter features.
In addition to the features that are provided automatically by the
LlmChatView, a number of integration points allow your app to blend
seamlessly with other features to provide additional functionality:
- Welcome messages: Display an initial greeting to users.
- Suggested prompts: Offer users predefined prompts to guide interactions.
- System instructions: Provide the LLM with specific input to influence its responses.
- Disable attachments and audio input: Remove optional parts of the chat UI.
- Manage cancel or error behavior: Change the user cancellation or LLM error behavior.
- Manage history: Every LLM provider allows for managing chat history, which is useful for clearing it, changing it dynamically and storing it between sessions.
- Chat serialization/deserialization: Store and retrieve conversations between app sessions.
- Custom response widgets: Introduce specialized UI components to present LLM responses.
- Custom styling: Define unique visual styles to match the chat appearance to the overall app.
- Chat without UI: Interact directly with the LLM providers without affecting the user's current chat session.
- Custom LLM providers: Build your own LLM provider for integration of chat with your own model backend.
- Rerouting prompts: Debug, log, or reroute messages meant for the provider to track down issues or route prompts dynamically.
Welcome messages
#The chat view allows you to provide a custom welcome message to set context for the user:
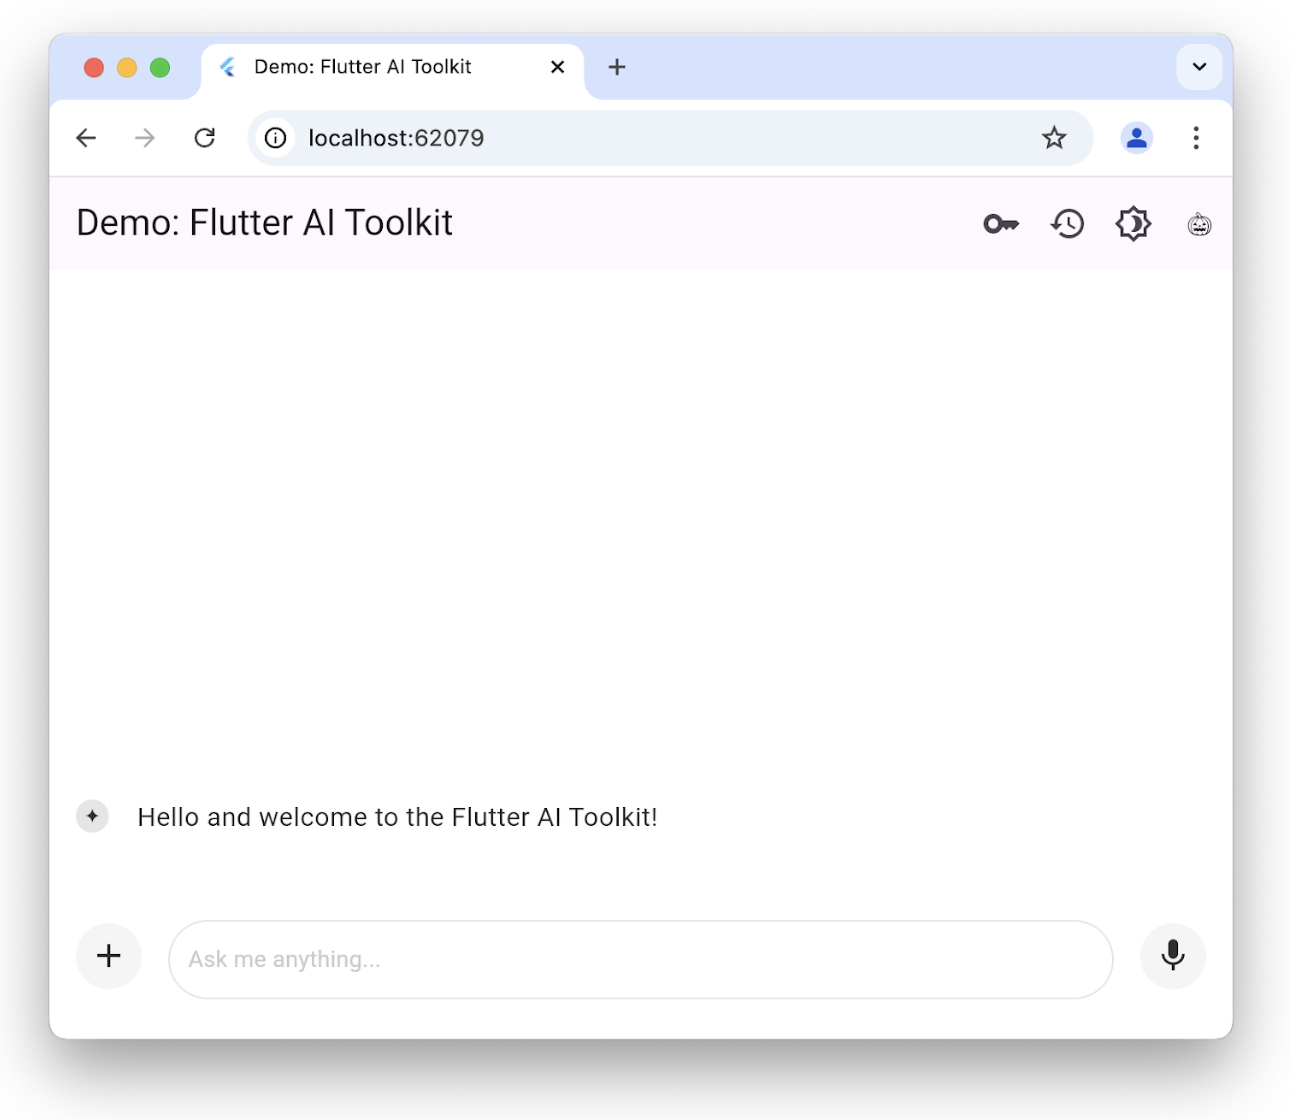
You can initialize the LlmChatView with a welcome message by setting the
welcomeMessage parameter:
class ChatPage extends StatelessWidget {
const ChatPage({super.key});
@override
Widget build(BuildContext context) => Scaffold(
appBar: AppBar(title: const Text(App.title)),
body: LlmChatView(
welcomeMessage: 'Hello and welcome to the Flutter AI Toolkit!',
provider: FirebaseProvider(
model: FirebaseAI.geminiAI().generativeModel(
model: 'gemini-2.5-flash',
),
),
),
);
}
To see a complete example of setting the welcome message, check out the welcome example.
Suggested prompts
#You can provide a set of suggested prompts to give the user some idea of what the chat session has been optimized for:
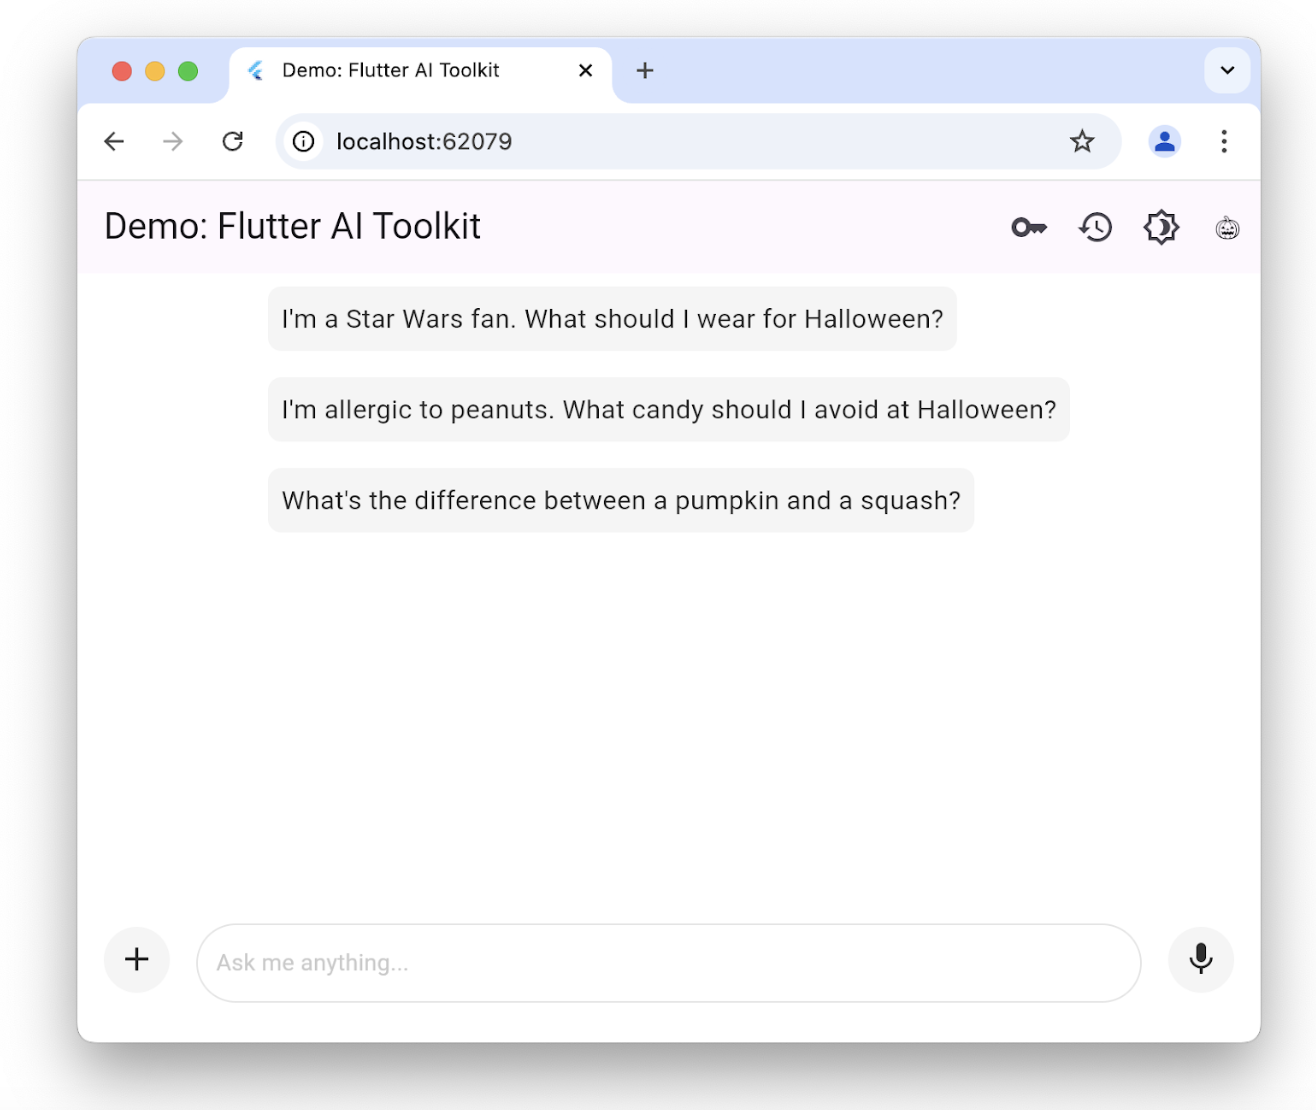
The suggestions are only shown when there is no existing chat history. Clicking
one sends it immediately as a request to the underlying LLM. To set the list of
suggestions, construct the LlmChatView with the suggestions
parameter:
class ChatPage extends StatelessWidget {
const ChatPage({super.key});
@override
Widget build(BuildContext context) => Scaffold(
appBar: AppBar(title: const Text(App.title)),
body: LlmChatView(
suggestions: [
'I\'m a Star Wars fan. What should I wear for Halloween?',
'I\'m allergic to peanuts. What candy should I avoid at Halloween?',
'What\'s the difference between a pumpkin and a squash?',
],
provider: FirebaseProvider(
model: FirebaseAI.geminiAI().generativeModel(
model: 'gemini-2.5-flash',
),
),
),
);
}
To see a complete example of setting up suggestions for the user, take a look at the suggestions example.
LLM instructions
#
To optimize an LLM's responses based on the needs of your app, you'll want to
give it instructions. For example, the recipes example app
uses the
systemInstructions parameter of the GenerativeModel class to tailor the LLM
to focus on delivering recipes based on the user's instructions:
class _HomePageState extends State<HomePage> {
...
// create a new provider with the given history and the current settings
LlmProvider _createProvider([List<ChatMessage>? history]) => FirebaseProvider(
history: history,
...,
model: FirebaseAI.geminiAI().generativeModel(
model: 'gemini-2.5-flash',
...,
systemInstruction: Content.system('''
You are a helpful assistant that generates recipes based on the ingredients and
instructions provided as well as my food preferences, which are as follows:
${Settings.foodPreferences.isEmpty ? 'I don\'t have any food preferences' : Settings.foodPreferences}
You should keep things casual and friendly. You may generate multiple recipes in a single response, but only if asked. ...
''',
),
),
);
...
}
Setting system instructions is unique to each provider; the FirebaseProvider
allows you to provide them through the systemInstruction parameter.
Notice that, in this case, we're bringing in user preferences as part of the
creation of the LLM provider passed to the LlmChatView constructor. We set the
instructions as part of the creation process each time the user changes their
preferences. The recipes app allows the user to change their food preferences
using a drawer on the scaffold:
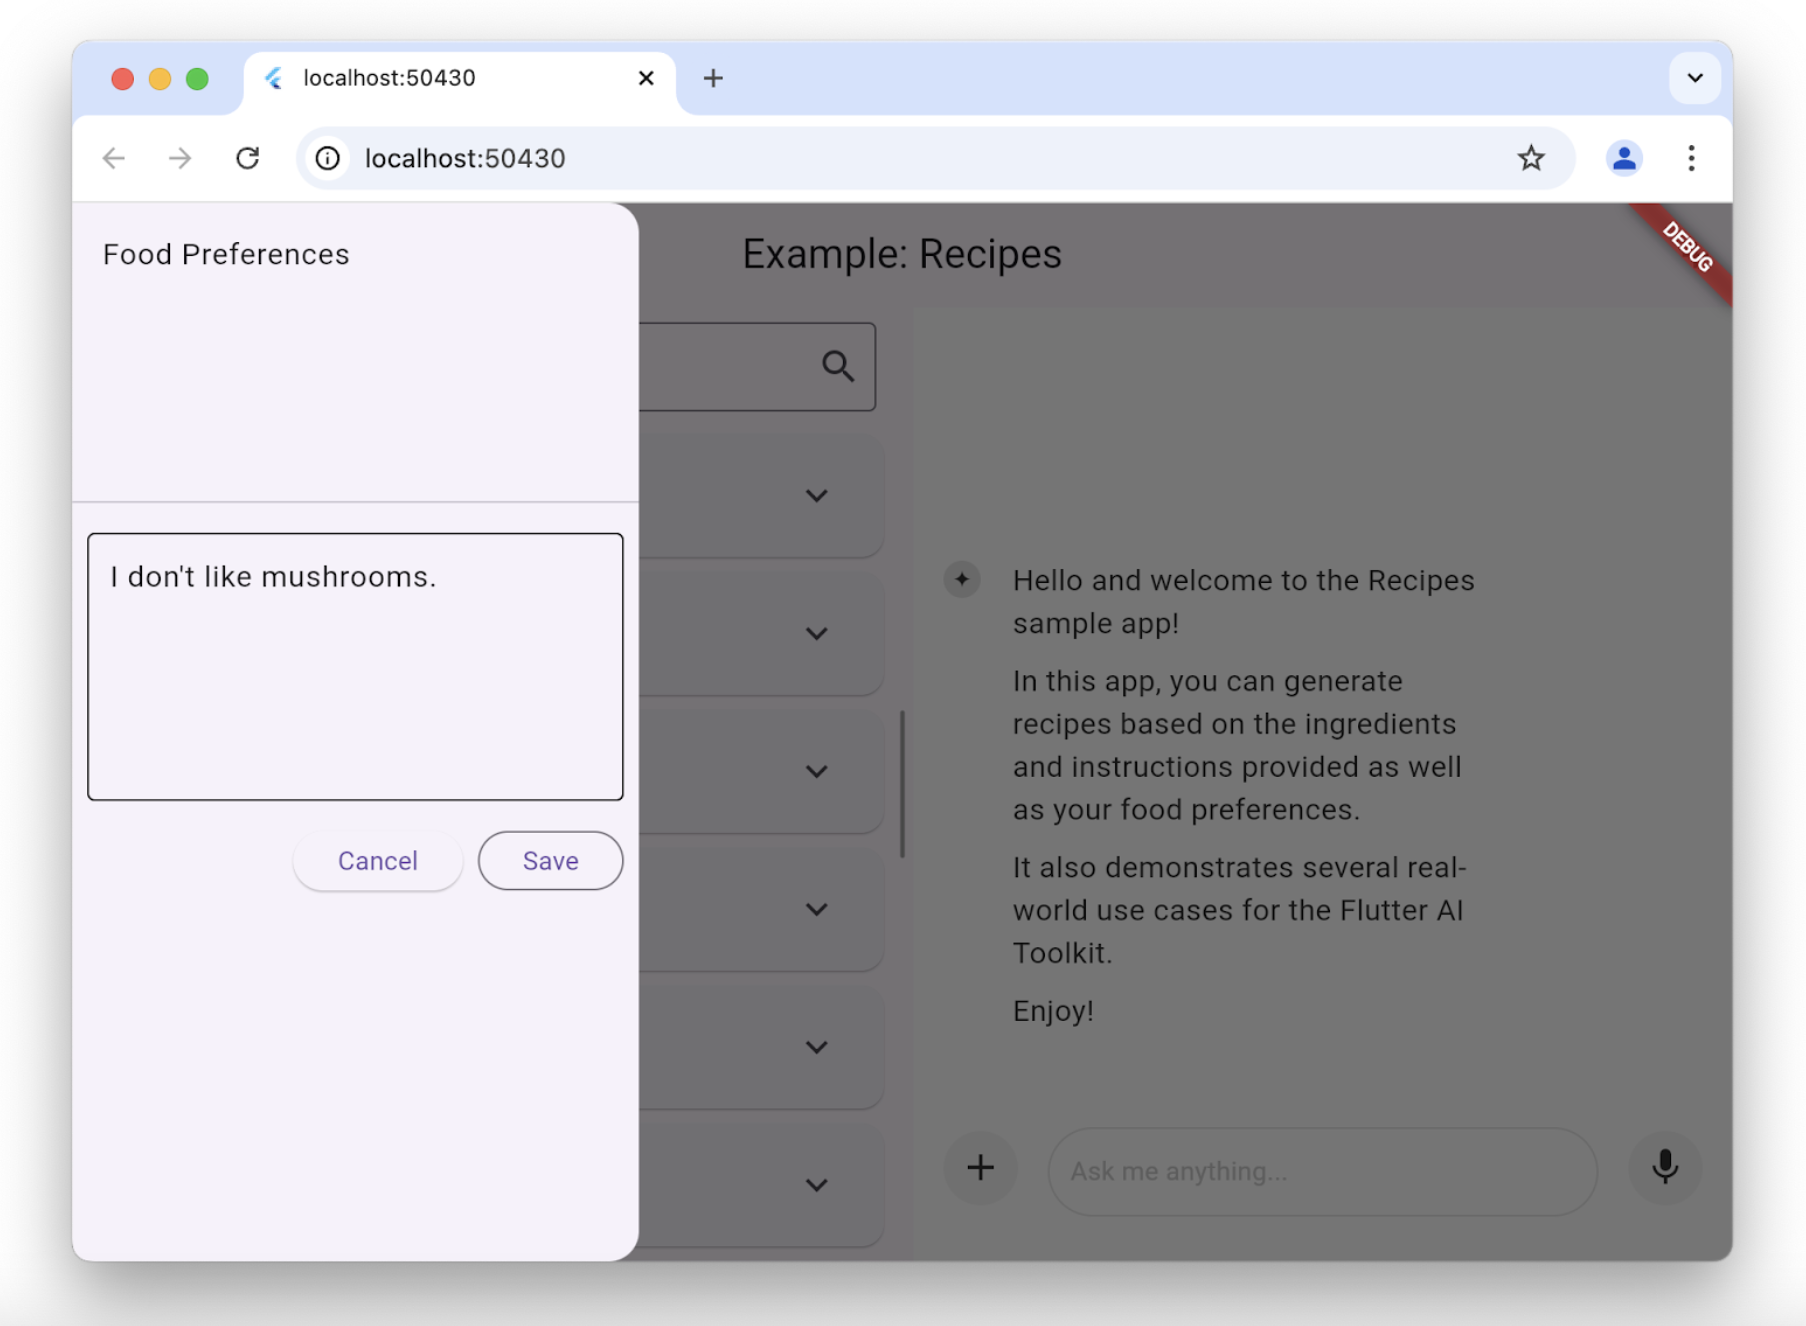
Whenever the user changes their food preferences, the recipes app creates a new model to use the new preferences:
class _HomePageState extends State<HomePage> {
  ...
  void _onSettingsSave() => setState(() {
        // move the history over from the old provider to the new one
        final history = _provider.history.toList();
        _provider = _createProvider(history);
      });
}
Function calling
#
To enable the LLM to perform actions on behalf of the user, you can provide a
set of tools (functions) that the LLM can call. The FirebaseProvider supports
function calling out of the box. It handles the loop of sending the user's
prompt, receiving a function call request from the LLM, executing the function,
and sending the result back to the LLM until a final text response is generated.
To use function calling, you need to define your tools and pass them to the
FirebaseProvider. Check out the function calling example
for details.
Disable attachments and audio input
#
If you'd like to disable attachments (the + button) or audio input (the mic
button), you can do so with the enableAttachments and enableVoiceNotes
parameters to the LlmChatView constructor:
class ChatPage extends StatelessWidget {
const ChatPage({super.key});
@override
Widget build(BuildContext context) {
// ...
return Scaffold(
appBar: AppBar(title: const Text('Restricted Chat')),
body: LlmChatView(
// ...
enableAttachments: false,
enableVoiceNotes: false,
),
);
}
}
Both of these flags default to true.
Custom speech-to-text
#
By default, the AI Toolkit uses the LlmProvider to pass to the LlmChatView
to provide the speech-to-text implementation. If you'd like to provide your own
implementation, for example to use a device-specific service, you can do so by
implementing the SpeechToText interface and passing it to the LlmChatView
constructor:
LlmChatView(
  // ...
  speechToText: MyCustomSpeechToText(),
)
Check out the custom STT example for details.
Manage cancel or error behavior
#By default, when the user cancels an LLM request, the LLM's response will be appended with the string "CANCEL" and a message will pop up that the user has canceled the request. Likewise, in the event of an LLM error, like a dropped network connection, the LLM's response will be appended with the string "ERROR" and an alert dialog will pop up with the details of the error.
You can override the cancel and error behavior with the cancelMessage,
errorMessage, onCancelCallback and onErrorCallback
parameters of the
LlmChatView. For example, the following code replaces the default cancellation
handling behavior:
class ChatPage extends StatelessWidget {
// ...
void _onCancel(BuildContext context) {
ScaffoldMessenger.of(
context,
).showSnackBar(const SnackBar(content: Text('Chat cancelled')));
}
@override
Widget build(BuildContext context) => Scaffold(
appBar: AppBar(title: const Text(App.title)),
body: LlmChatView(
// ...
onCancelCallback: _onCancel,
cancelMessage: 'Request cancelled',
),
);
}
You can override any or all of these parameters and the LlmChatView will use
its defaults for anything you don't override.
Manage history
#The standard interface that defines all LLM providers that can plug into the chat view includes the ability to get and set history for the provider:
abstract class LlmProvider implements Listenable {
Stream<String> generateStream(
String prompt, {
Iterable<Attachment> attachments,
});
Stream<String> sendMessageStream(
String prompt, {
Iterable<Attachment> attachments,
});
Iterable<ChatMessage> get history;
set history(Iterable<ChatMessage> history);
}
When the history for a provider changes, it calls the notifyListener method
exposed by the Listenable base class. This means that you manually
subscribe/unsubscribe with the add and remove methods or use it to construct
an instance of the ListenableBuilder class.
The generateStream method calls into the underlying LLM without affecting the
history. Calling the sendMessageStream method changes the history by adding
two new messages to the provider's history—one for the user message and one for
the LLM response—when the response is completed. The chat view uses
sendMessageStream when it processes a user's chat prompt and generateStream
when it's processing the user's voice input.
To see or set the history, you can access the history property:
void _clearHistory() => _provider.history = [];
The ability to access a provider's history is also useful when it comes to recreating a provider while maintaining the history:
class _HomePageState extends State<HomePage> {
  ...
  void _onSettingsSave() => setState(() {
        // move the history over from the old provider to the new one
        final history = _provider.history.toList();
        _provider = _createProvider(history);
      });
}
The _createProvider method creates a new provider with the history from the
previous provider and the new user preferences. It's seamless for the user;
they can keep chatting away but now the LLM gives them responses taking their
new food preferences into account. For example:
class _HomePageState extends State<HomePage> {
  ...
  // create a new provider with the given history and the current settings
  LlmProvider _createProvider([List<ChatMessage>? history]) =>
    FirebaseProvider(
      history: history,
      ...
    );
  ...
}
To see history in action, check out the recipes example app and the history example app.
Chat serialization/deserialization
#
To save and restore chat history between sessions of an app requires the ability
to serialize and deserialize each user prompt, including the attachments, and
each LLM response. Both kinds of messages (the user prompts and LLM responses),
are exposed in the ChatMessage class. Serialization can be accomplished by
using the toJson method of each ChatMessage instance.
Future<void> _saveHistory() async {
// get the latest history
final history = _provider.history.toList();
// write the new messages
for (var i = 0; i != history.length; ++i) {
// skip if the file already exists
final file = await _messageFile(i);
if (file.existsSync()) continue;
// write the new message to disk
final map = history[i].toJson();
final json = JsonEncoder.withIndent(' ').convert(map);
await file.writeAsString(json);
}
}
Likewise, to deserialize, use the static fromJson method of the ChatMessage
class:
Future<void> _loadHistory() async {
// read the history from disk
final history = <ChatMessage>[];
for (var i = 0;; ++i) {
final file = await _messageFile(i);
if (!file.existsSync()) break;
final map = jsonDecode(await file.readAsString());
history.add(ChatMessage.fromJson(map));
}
// set the history on the controller
_provider.history = history;
}
To ensure fast turnaround when serializing, we recommend only writing each user message once. Otherwise, the user must wait for your app to write every message every time and, in the face of binary attachments, that could take a while.
To see this in action, check out the history example app.
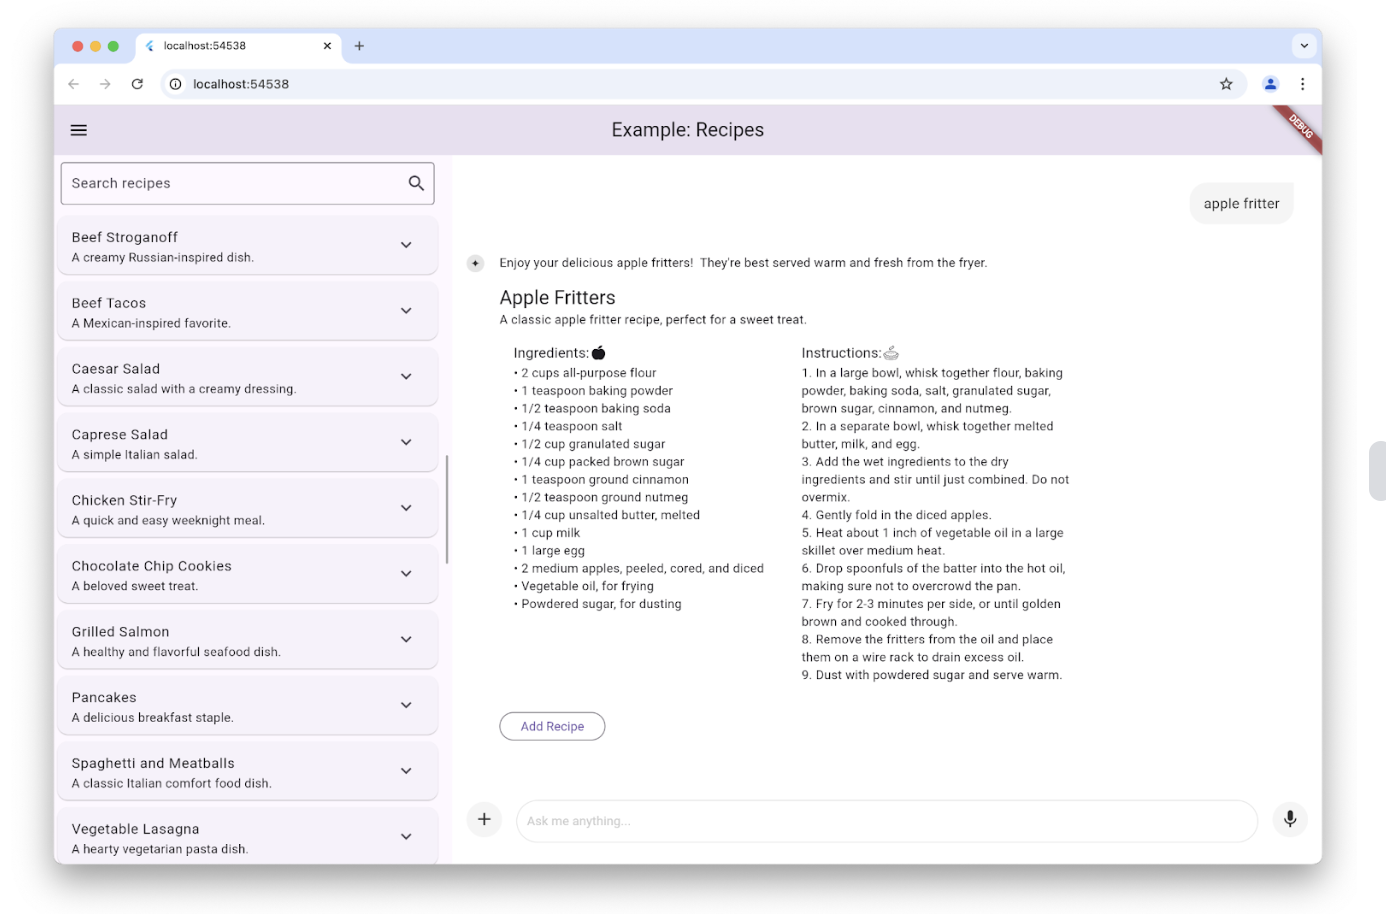
Custom response widgets
#By default, the LLM response shown by the chat view is formatted Markdown. However, in some cases, you want to create a custom widget to show the LLM response that's specific to and integrated with your app. For example, when the user requests a recipe in the recipes example app, the LLM response is used to create a widget that's specific to showing recipes just like the rest of the app does and to provide for an Add button in case the user would like to add the recipe to their database:
This is accomplished by setting the responseBuilder parameter of the
LlmChatView constructor:
LlmChatView(
  provider: _provider,
  welcomeMessage: _welcomeMessage,
  responseBuilder: (context, response) => RecipeResponseView(
    response,
  ),
),
In this particular example, the RecipeReponseView widget is constructed with
the LLM provider's response text and uses that to implement its build
method:
class RecipeResponseView extends StatelessWidget {
const RecipeResponseView(this.response, {super.key});
final String response;
@override
Widget build(BuildContext context) {
final children = <Widget>[];
String? finalText;
// created with the response from the LLM as the response streams in, so
// many not be a complete response yet
try {
final map = jsonDecode(response);
final recipesWithText = map['recipes'] as List<dynamic>;
finalText = map['text'] as String?;
for (final recipeWithText in recipesWithText) {
// extract the text before the recipe
final text = recipeWithText['text'] as String?;
if (text != null && text.isNotEmpty) {
children.add(MarkdownBody(data: text));
}
// extract the recipe
final json = recipeWithText['recipe'] as Map<String, dynamic>;
final recipe = Recipe.fromJson(json);
children.add(const Gap(16));
children.add(Column(
crossAxisAlignment: CrossAxisAlignment.start,
children: [
Text(recipe.title, style: Theme.of(context).textTheme.titleLarge),
Text(recipe.description),
RecipeContentView(recipe: recipe),
],
));
// add a button to add the recipe to the list
children.add(const Gap(16));
children.add(OutlinedButton(
onPressed: () => RecipeRepository.addNewRecipe(recipe),
child: const Text('Add Recipe'),
));
children.add(const Gap(16));
}
} catch (e) {
debugPrint('Error parsing response: $e');
}
...
return Column(
crossAxisAlignment: CrossAxisAlignment.start,
children: children,
);
}
}
This code parses the text to extract introductory text and the recipe from the LLM, bundling them together with an Add Recipe button to show in place of the Markdown.
Notice that we're parsing the LLM response as JSON. It's common to set the
provider into JSON mode and to provide a schema to restrict the format of its
responses to ensure that we've got something we can parse. Each provider exposes
this functionality in its own way, but the FirebaseProvider class enables
this with a GenerationConfig object that the recipes example uses as follows:
class _HomePageState extends State<HomePage> {
...
// create a new provider with the given history and the current settings
LlmProvider _createProvider([List<ChatMessage>? history]) => FirebaseProvider(
...
model: FirebaseAI.geminiAI().generativeModel(
...
generationConfig: GenerationConfig(
responseMimeType: 'application/json',
responseSchema: Schema(...),
systemInstruction: Content.system('''
...
Generate each response in JSON format
with the following schema, including one or more "text" and "recipe" pairs as
well as any trailing text commentary you care to provide:
{
"recipes": [
{
"text": "Any commentary you care to provide about the recipe.",
"recipe":
{
"title": "Recipe Title",
"description": "Recipe Description",
"ingredients": ["Ingredient 1", "Ingredient 2", "Ingredient 3"],
"instructions": ["Instruction 1", "Instruction 2", "Instruction 3"]
}
}
],
"text": "any final commentary you care to provide",
}
''',
),
),
);
...
}
This code initializes the GenerationConfig object by setting the
responseMimeType parameter to 'application/json' and the
responseSchema
parameter to an instance of the Schema class that defines the structure of the
JSON that you're prepared to parse. In addition, it's good practice to also ask
for JSON and to provide a description of that JSON schema in the system
instructions, which we've done here.
To see this in action, check out the recipes example app.
Custom styling
#
The chat view comes out of the box with a set of default styles for the
background, the text field, the buttons, the icons, the suggestions, and so on.
You can fully customize those styles by setting your own by using the style
parameter to the LlmChatView constructor:
LlmChatView(
  provider: FirebaseProvider(...),
  style: LlmChatViewStyle(...),
),
For example, the custom styles example app uses this feature to implement an app with a Halloween theme:
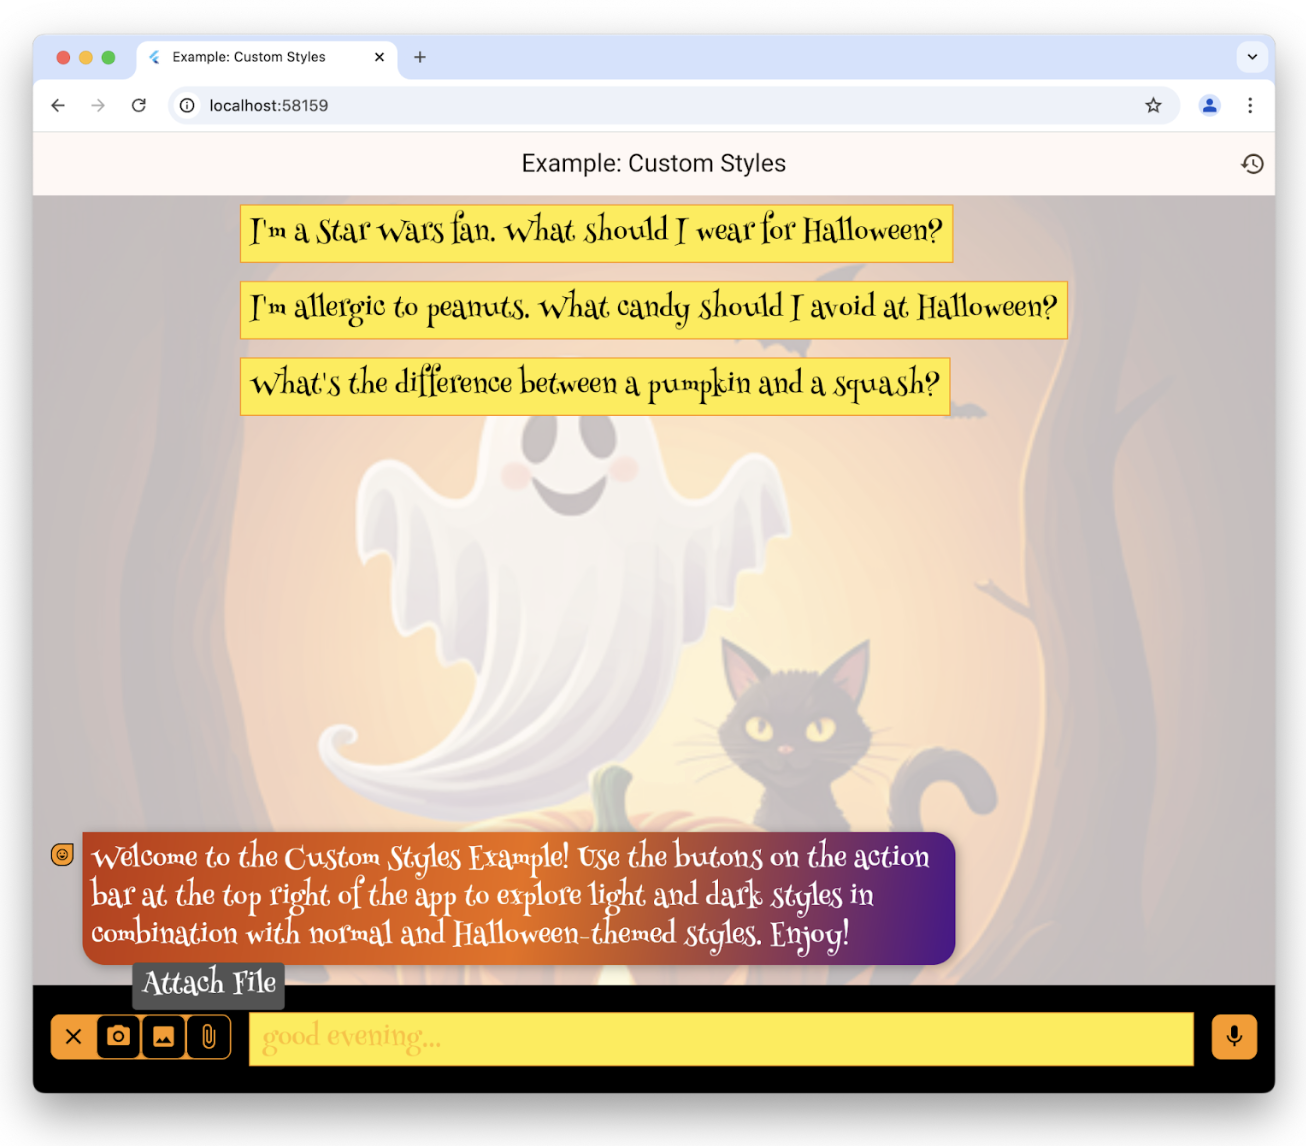
For a complete list of the styles available in the LlmChatViewStyle class,
check out the reference documentation. You can also customize the appearance
of the voice recorder using the voiceNoteRecorderStyle parameter of the
LlmChatViewStyle class, which is demonstrated in the styles
example.
To see custom styles in action, in addition to the custom styles example and the styles example, check out the dark mode example and the demo app.
Chat without UI
#You don't have to use the chat view to access the functionality of the underlying provider. In addition to being able to simply call it with whatever proprietary interface it provides, you can also use it with the LlmProvider interface.
As an example, the recipes example app provides a Magic button on the page for editing recipes. The purpose of that button is to update an existing recipe in your database with your current food preferences. Pressing the button allows you to preview the recommended changes and decide whether you'd like to apply them or not:
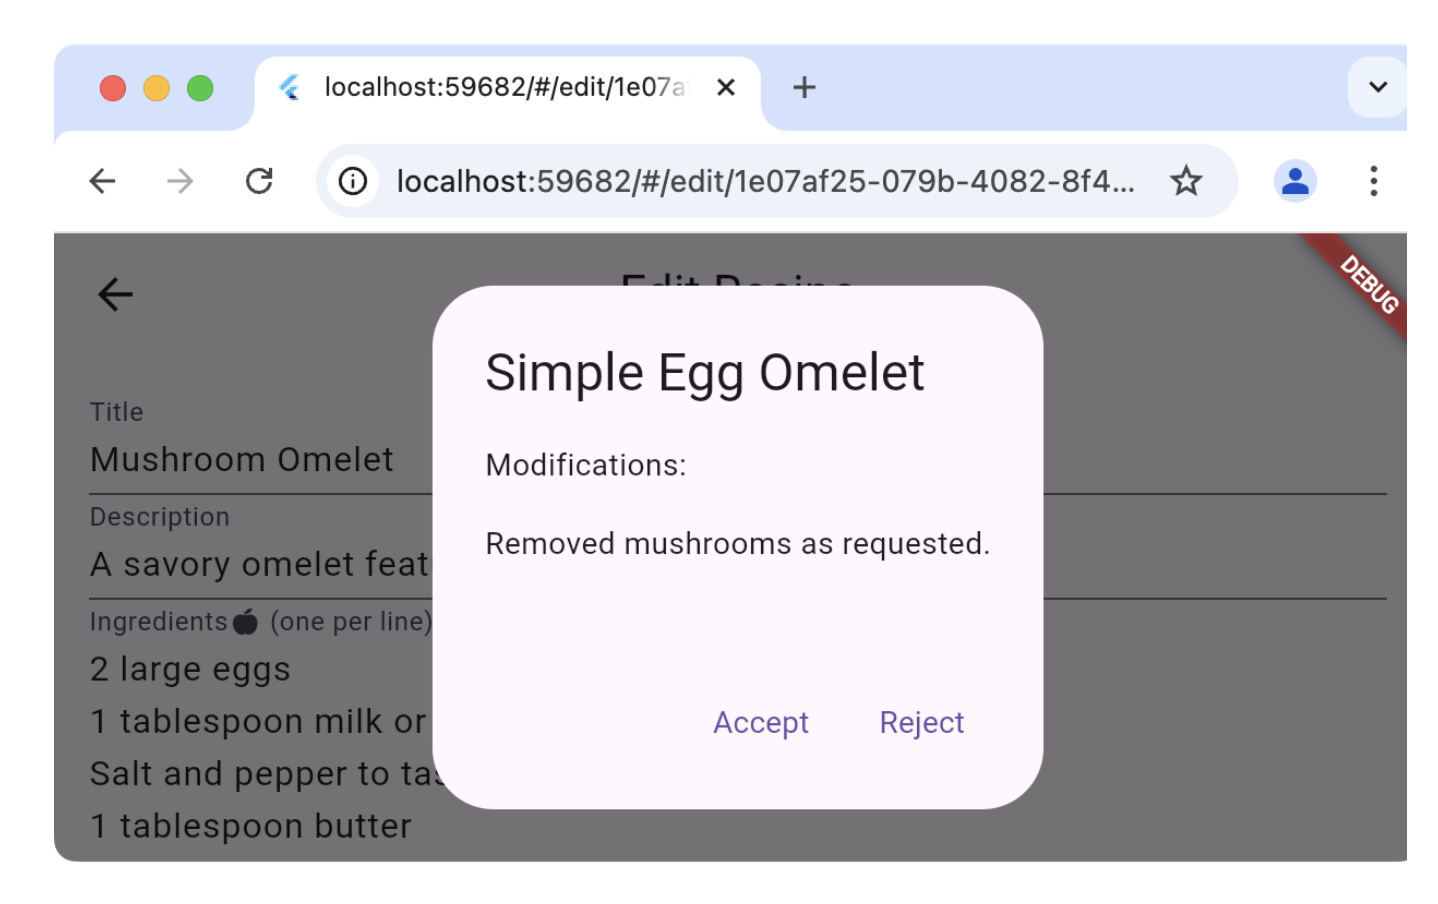
Instead of using the same provider that the chat portion of the app uses, which would insert spurious user messages and LLM responses into the user's chat history, the Edit Recipe page instead creates its own provider and uses it directly:
class _EditRecipePageState extends State<EditRecipePage> {
...
final _provider = FirebaseProvider(...);
...
Future<void> _onMagic() async {
final stream = _provider.sendMessageStream(
'Generate a modified version of this recipe based on my food preferences: '
'${_ingredientsController.text}\n\n${_instructionsController.text}',
);
var response = await stream.join();
final json = jsonDecode(response);
try {
final modifications = json['modifications'];
final recipe = Recipe.fromJson(json['recipe']);
if (!context.mounted) return;
final accept = await showDialog<bool>(
context: context,
builder: (context) => AlertDialog(
title: Text(recipe.title),
content: Column(
crossAxisAlignment: CrossAxisAlignment.start,
children: [
const Text('Modifications:'),
const Gap(16),
Text(_wrapText(modifications)),
],
),
actions: [
TextButton(
onPressed: () => context.pop(true),
child: const Text('Accept'),
),
TextButton(
onPressed: () => context.pop(false),
child: const Text('Reject'),
),
],
),
);
...
} catch (ex) {
...
}
}
}
}
The call to sendMessageStream creates entries in the provider's history, but
since it's not associated with a chat view, they won't be shown. If it's
convenient, you can also accomplish the same thing by calling generateStream,
which allows you to reuse an existing provider without affecting the chat
history.
To see this in action, check out the Edit Recipe page of the recipes example.
Rerouting prompts
#
If you'd like to debug, log, or manipulate the connection between the chat view
and the underlying provider, you can do so with an implementation of an
LlmStreamGenerator
function. You then pass that function to the
LlmChatView in the messageSender parameter:
class ChatPage extends StatelessWidget {
final _provider = FirebaseProvider(...);
@override
Widget build(BuildContext context) => Scaffold(
appBar: AppBar(title: const Text(App.title)),
body: LlmChatView(
provider: _provider,
messageSender: _logMessage,
),
);
Stream<String> _logMessage(
String prompt, {
required Iterable<Attachment> attachments,
}) async* {
// log the message and attachments
debugPrint('# Sending Message');
debugPrint('## Prompt\n$prompt');
debugPrint('## Attachments\n${attachments.map((a) => a.toString())}');
// forward the message on to the provider
final response = _provider.sendMessageStream(
prompt,
attachments: attachments,
);
// log the response
final text = await response.join();
debugPrint('## Response\n$text');
// return it
yield text;
}
}
This example logs the user prompts and LLM responses as they go back and forth.
When providing a function as a messageSender, it's your responsibility to call
the underlying provider. If you don't, it won't get the message. This capability
allows you to do advanced things like routing to a provider dynamically or
Retrieval Augmented Generation (RAG).
To see this in action, check out the logging example app.
Unless stated otherwise, the documentation on this site reflects Flutter 3.41.5. Page last updated on 2026-04-13. View source or report an issue.