Integrate a Flutter app into your macOS project
Learn how to integrate a Flutter app into your existing macOS project.
Flutter UI components can be incrementally added into your existing macOS application using Swift packages.
Prerequisites
#- Flutter 3.44 or later
- Xcode 15.0 or later
Migrate from legacy integration (if applicable)
#If you've already integrated Flutter into your macOS app using embedded frameworks, you must first remove that integration before following the Swift Package Manager instructions below.
Expand to see instructions to migrate from embedded frameworks integration
If your app was previously integrated using frameworks
generated by the flutter build macos-framework command,
you must first remove the frameworks from your Xcode project.
Navigate to your target's General tab and remove all Flutter-related frameworks and libraries under Frameworks, Libraries, and Embedded Content.
This includes the
App.xcframework,FlutterMacOS.xcframework,FlutterPluginRegistrant.xcframework, and any Flutter plugins'xcframeworkfiles.Remove the Flutter pod from your Podfile
MyApp/Podfilerubypod 'FlutterMacOS', :podspec => '/path/to/MyApp/Flutter/[build mode]/FlutterMacOS.podspec'Run
pod install.
Organize your projects relative to each other
#This guide assumes that your existing macOS app and your Flutter app reside in sibling directories. If you have a different directory structure, you will need to adjust the example relative paths accordingly.
The example directory structure resembles the following:
-
my_flutter_app/
- macos/
lib/
- main.dart
-
MyNativeApp/
- MyNativeApp.xcodeproj/
Integrate with Swift Package Manager
#-
Build the FlutterNativeIntegration Swift package
Within your Flutter application or module, run the following command:
flutter build swift-package --platform macosThis generates the following directories:
my_flutter_app/build/macos/SwiftPackages/
- FlutterNativeIntegration/(A Swift package)
- Scripts/(Directory of scripts and other files needed)
You can optionally change the location of this output with the
--outputflag. -
Add FlutterNativeIntegration to your Xcode project
In the Project navigator, right click on your project and select Add Files to "MyNativeApp"...
Navigate to and select the generated
FlutterNativeIntegrationSwift package and click Add.Select Reference files in place and click Finish.
In the File inspector, verify the Location is Relative to Project. If it is not, you'll need to move the Flutter output directory to be a sibling directory of your native app.
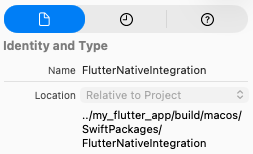
Relative location of FlutterNativeIntegration shown in Xcode's File inspector.
Navigate to your target's General tab and add
FlutterNativeIntegrationunder Frameworks, Libraries, and Embedded Content.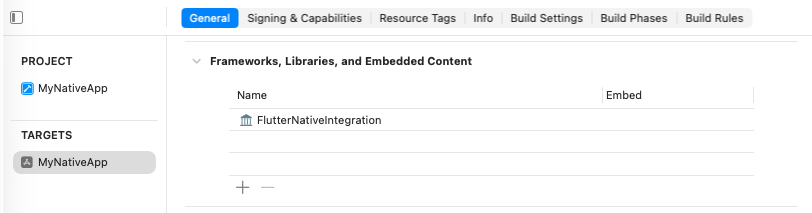
FlutterNativeIntegration under Frameworks, Libraries, and Embedded Content.
-
Add build settings
In the Build Settings tab, set the location of the Flutter app's Swift package output directory:
FLUTTER_SWIFT_PACKAGE_OUTPUT=$SRCROOT/../my_flutter_app/build/macos/SwiftPackagesFor custom configurations, set the Flutter build mode.
Flutter supports three build modes: Debug, Profile, and Release. The build mode is determined using the
CONFIGURATIONvalue. If your configuration does not match one of these, you can set theFLUTTER_BUILD_MODEbuild setting to one of these values.
Setting
FLUTTER_BUILD_MODEfor custom configurations under Build Settings.For Debug configurations only, set the following build settings:
ENABLE_APP_SANDBOX=YES
ENABLE_INCOMING_NETWORK_CONNECTIONS=YES
RUNTIME_EXCEPTION_ALLOW_JIT=YES
Set Allow JIT (RUNTIME_EXCEPTION_ALLOW_JIT) to YES in the target's Build Settings for Debug configurations only.
(Optional) Allow Xcode to re-build your Flutter app.
Add the following build settings to your target to allow Xcode to re-build your Flutter app as part of its build. This allows you to make changes to your Flutter application without needing to re-run
flutter build swift-package. This requires a Flutter installation on the machine.FLUTTER_APPLICATION_PATH=$SRCROOT/../my_flutter_app ENABLE_USER_SCRIPT_SANDBOXING=NO
-
Add Pre-action Run Script to Scheme
Open Product > Scheme > Edit Scheme... > Build (in left side bar) > Pre-action > + > New Run Script Action
Select your project in the Provide build settings from dropdown.
Set the script to the following:
/bin/sh $FLUTTER_SWIFT_PACKAGE_OUTPUT/Scripts/flutter_integration.sh prebuild
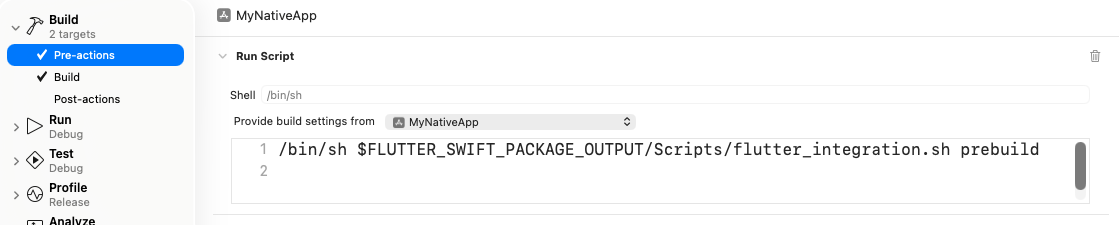
Pre-action Run Script in scheme editor.
-
Add new run script build phase to your target
Navigate to your target's Build Phases > + > New Run Script Phase
Set the script to the following:
/bin/sh $FLUTTER_SWIFT_PACKAGE_OUTPUT/Scripts/flutter_integration.sh assembleUncheck Based on dependency analysis
Add the following to Input File Lists:
$(FLUTTER_SWIFT_PACKAGE_OUTPUT)/Scripts/FlutterAssembleInputs.xcfilelist
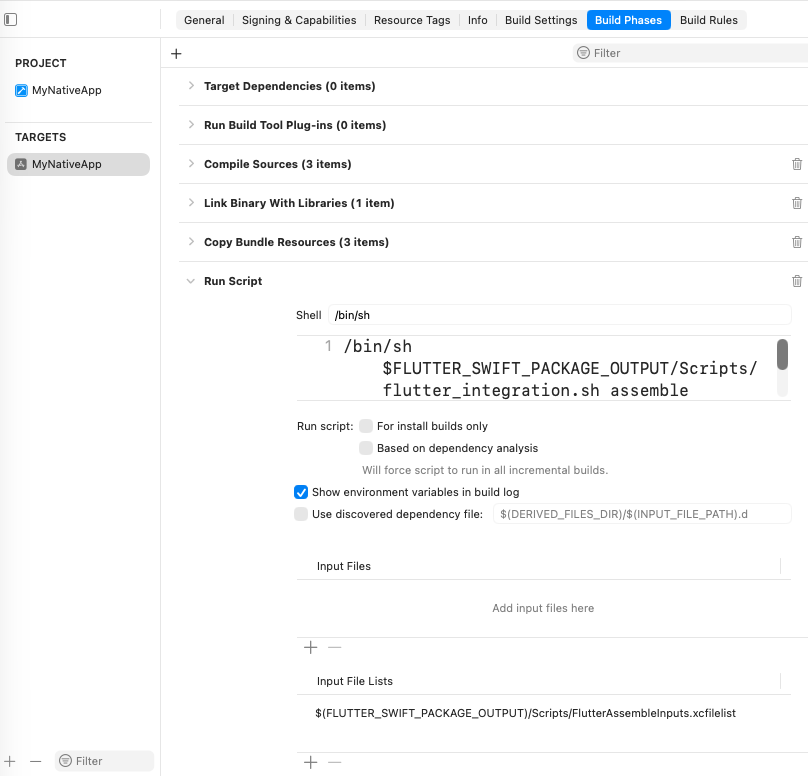
New Run Script Build Phase under Build Phases.
Next steps
#You can now add a Flutter screen to your existing macOS app.
Unless stated otherwise, the documentation on this site reflects Flutter 3.44.0. Page last updated on 2026-06-08. View source or report an issue.